
Come find us on Wordpress. All future blog posts will be over there, so please follow us to the new page! www.thewondercraft.com/blog
Tuesday, August 30, 2011
Friday, June 24, 2011
Handmade round-up: Baby boy
Lately I've been seeing so many cute baby girl things, that I was on the hunt for some baby boy cuteness for my little man. I discovered these awesome handmade goodies which we'll have to see about carrying in the shop:

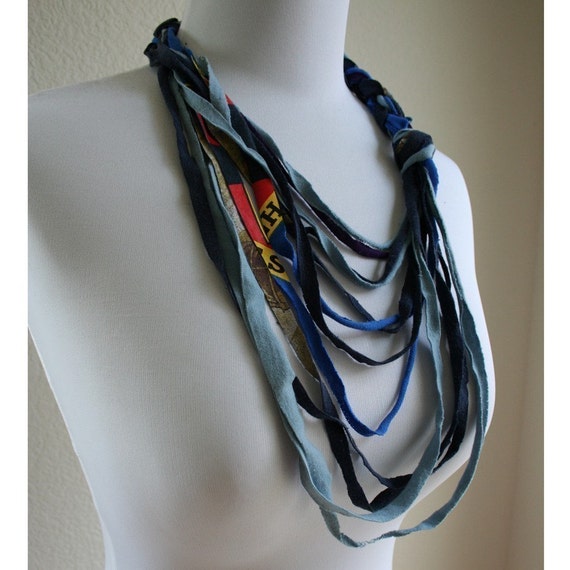
1- Little Sidekick on Etsy (found via Austin Craft Riot)
2- Little Goodall on Etsy (another Texan!)
3- By Laura Design on Etsy
4- Crochet Baby Boutique on Etsy
5- BabyBolt on Etsy (Available in our shop!)
You can view more of my handmade baby selections on my Pinterest board.
Here's a pic of the little dude sporting his mama's Mustache Onesie, always available in our shop.

Thursday, June 9, 2011
Announcement: Brick & Mortar!
For those of you who guessed it was a Loft on the East side, you were right! Our new space is in the "Waterstreet Lofts" building at 1601 East Cesar Chavez at Comal. The space is perfect for us with concrete floors, open floor plan and big front windows. We're having a blast planning the displays and choosing paint colors.
The thing we're most excited about is to debut the space not only as a retail store but also as a new creative space for crafters & makers. We aim to provide a social atmosphere where all types can come in and make something, use our tools & supplies and workspace. We'll have planned projects, guest instructors & specialty tools to entice anyone with an itch for DIY.
 Some of you may be wondering 'What about Stella the airstream?' We've got plans for her too! We'll be keeping her just down the road at her current location at Starving Art (2324 E. Cesar Chavez) and having her available as another workspace for classes, parties, and private rental. Her new (preliminary) set-up will debut TOMORROW NIGHT at Etsy's Craft Party put on by Austin Craft Riot. The party is free to attend and we'll be screen printing in Stella while tons of other crafty activities go on upstairs in the gallery. Friday June 10th, 7-10pm at Starving Art.
Stay tuned for our planned opening in late July and of course a huge party to celebrate down the road!
Friday, May 13, 2011
Renegade Craft: We need YOU!

Next weekend is the hugely awesome Renegade Craft Fair! Its at Palmer Events Center, Saturday and Sunday 11-7. We're bringing Stella right into the mix again this year and have a whole new craft for you. Upcycled Cardboard Matchbook Wallets! Which is why we need your lightweight cardboard, like cereal boxes. If you have any of this stuff lying around please let us know & either bring it to the show or arrange to drop it by beforehand.

See how the wallet looks like a matchbook? You'll be able to cover it with a collage of papers and packing tape or use duct tape for the classic look.

 We'll have a boat load of magazines, book paper and other materials to use for collage, but feel free to bring your own stash!
Friday, May 6, 2011
Crafting From the Collection: Recap

Yesterday we missed First Thursday because we took a road trip! We were invited by the Amon Carter Museum in Ft. Worth to present several crafts for their quarterly event, Crafting From the Collection. The above pic is our fabric flower piece inspired by a still life of flowers at the museum. (Some of you may remember us posting about it back in January, that scheduled date got postponed due to the "snowpocaylpse")
In preparation for the demo, we made several example pieces along with a tutorial, which will be available in our Etsy shop and our boutique.
 We had a great group of very crafty ladies. Everyone quickly picked up the technique and got creative.
We loved the variations on our tutorial, the creative leaves and just the awesome vibe everyone brought to the event. We hope the Amon Carter will be interested in having The WonderCraft come up again to get crafty with another great group.

Before the event started, Jen and I visited the other museums right next to the Amon Carter, The Kimball & the Modern. We loved the architecture, the collections, and enjoyed the beautiful spring weather. This steel tree sculpture ('Conjoined' by artist Roxy Paine) was particularly cool.

How are you inspired by fine art?
Friday, April 29, 2011
Jesyka's Pinwheel Tutorial

Making the Pinwheel
Don't forget your materials!
1) Take your square of paper, and create guides from each edge toward the center, about 2/3s of the way down. Mark the center. You can do this with either a ruler, or by folding the paper in half from corner to corner, and cutting along the folds.
2) Cut your paper from the edge to the guide. If you are using a paper cutter, it's easy to align the edges across a diagonal to ensure that your cuts all point toward the exact center.
4) If your hole punch doesn't have enough give to punch the center hole, use the edge of the skewer to punch the hole. :) If you manage to punch a hole with your hole punch, place the center hold on the edge of a skewer. This helps to keep the holes lined up while we fold in the edges.
5) Put a dab of hot glue near the center. Try not to cover the skewer too much (a little is okay), or you'll have a difficult time getting the skewer back out.

Making the Centerpiece
7) Get out your small square of paper and corner punch.
9) Using your hole puncher, punch a hole in the middle.
10) Add a bit more glue to the center.11) Place the small paper over the skewer. I like to place it so a corner of the the small paper is in the center of each flap.
12) Place an eyelet in the center. Use the eyelet setter to really help it stick together, and keep it sturdy. The pinwheel is done and we are ready for the next stage!
Making the Pinwheel Stick
13) Place a small dab of hot glue at the blunt end of the bamboo skewer.
14) Cut your ribbon at a 45° angle and place the edge flush against the top of the blunt end of the skewer to get the ribbon to twist nicely and evenly around your skewer. To ensure you have enough ribbon, do not cut the ribbon from the spool until we are done wrapping.
16) Place a small bit of glue at the tip of the skewer.
17) Cut the ribbon after you wrap it around the glue. Now get out your wooden beads!18) Place the bead on the end of the skewer. Add some glue to make it stay! (not shown).

Assembling the Pinwheel
19) Slide a couple of beads on to the pinhead.
21) Pull the pin through the back.
23) Stick your pin through the ribbon-wrapped skewer about an inch and a half down from the blunt edge. If you're having trouble, use an ice pic or a nail and hammer to start the hole. :) At this point you'll want to make sure it spins, so blow on your pinwheel. If it gets stuck, you'll want to add more beads between the pinwheel an the skewer (you can see how I added a fourth bead to ensure that it spins nicely).
24) Using your wire cutters, trim the excess pin.25) There will be a little knub left, which could cut someone, so;
26) Put a dab of hot glue over the knub to protect fingers. You could cover with another bead or another piece of ribbon if you want to distract from it.27) Glue a bead on the top, if you have not already done so.
28) And we are done! Admire your completed work. :)


Thursday, April 28, 2011
Jesyka's Pinwheel Tutorial: Materials List

I made these sweet pinwheels for favors and decor for my daughter's birthday party, and although I know there are plenty of pinwheel tutorials out there in blogland, I thought I would make my contribution seeing as these are a bit more elaborate than I have seen elsewhere. Since the materials list is long, (and I need a bit more time to prepare the step-by-step guide--Laelia is napping less and needing mommy more!), I'm releasing the materials list first, and hopefully I'll have the tutorial ready to go tomorrow! Stay tuned!
1) Paper! A lightweight cardstock works best, too thin and it doesn't have enough substance, and too thick it's too hard to fold, although any paper will definitely work. We even used some spray mount and glued some wrapping papers together to make some pretty double sided sheets (wrapping paper is great for many things, it's so cheap compared to the expensive sheets used for scrapbooking!). We did 6" x 6" for the large wheels, and 4.5" x 4.5" for the smaller wheels.

2) Scissors - For cutting slits in the paper. Alternately, you can use a paper cutter. I used both, depending on what was closest, they both have their advantages and disadvantages. A paper cutter will assure you a straight measured line, but there is something satisfying about picking up and just eyeballing a 45° angle...
3) Wire Cutters - The sort you'd use for jewelry making will work just fine. These are to cut the backs off the pins once we have them through the skewers.
4) Ribbon - To wrap around the skewers. Make. Pretty.
5) Eyelet Setter - To help set the eyelet in the center of the pinwheel. I have this set from JoAnns.
6) Beads - I used some glass beads I have had for about 15 years! Any beads larger than a seed bead has potential to work here.
7) Eyelets - These came as a set with the eyelet setter I bought. Use these at the center of the pinwheel.
8) Pins - A pin with a decorative head will work best, or you can glue a button or a cabochon will work as well. Just make sure that the pin head is large enough to hold on a bead. I bought these pins to hold the ribbon on the bouquets for my wedding. :)
9) Large Wooden Painted Beads - These go on the ends of the skewer to finish it off nicely. I bought a big pack of wood beads like these from JoAnns.
10) Hole Punch - You'll use this to punch holes, of course! Use a small hole punch.
11) More Paper! - These are 1.5" x 1.5" pieces of paper that get prettied up and are used in the center of the pinwheel.
12) Fancy Edge Cutter - To pretty up that piece of paper I was just typing about. :)
13) Bamboo Skewers - Use as the base of the pinwheel.
14) Glue Gun - We can always use a glue gun!
Friday, April 15, 2011
Shop +Craft = Shop Crafty!
Our first big spring show is finally HERE! Shop Crafty is this Saturday, April 16th 10am-5pm and I've been geting really amped up about all the cool stuff that will be going on at the show.
First off, you'd better be early because the first 30 will receive awesome goodie bags full of great stuff from us and the other sponsors! We've donated one of crafty tutorials for the ever popular Upcycled Strand Necklace. Read here for more about the other sponsors. And Since we're crafty studio sponsors, we'll have a huge booth with craft lounge! The craft we're doing is to collage & decoupage onto match boxes.

Great if you need matches on display anywhere (um...probably a good idea in the bathroom...) and fun if you just need a little box for buttons or other treasures (ie. if you are a kid who shouldn't have matches or a kid at heart who loves treasure boxes).
It will be a FREE craft, so come play with us! And if you want, bring your own items to decoupage, we'll have lots of great papers & supplies available.
First off, you'd better be early because the first 30 will receive awesome goodie bags full of great stuff from us and the other sponsors! We've donated one of crafty tutorials for the ever popular Upcycled Strand Necklace. Read here for more about the other sponsors.
 And Since we're crafty studio sponsors, we'll have a huge booth with craft lounge! The craft we're doing is to collage & decoupage onto match boxes.
Great if you need matches on display anywhere (um...probably a good idea in the bathroom...) and fun if you just need a little box for buttons or other treasures (ie. if you are a kid who shouldn't have matches or a kid at heart who loves treasure boxes).

It will be a FREE craft, so come play with us! And if you want, bring your own items to decoupage, we'll have lots of great papers & supplies available.
Friday, April 1, 2011
Get Inspired: Pinterest
 I'd like to make the forecast that Pinterest is going to be the next big thing. I might be wrong, but I'm certainly enjoying 'wasting' a lot of time getting sucked down its rabbit hole. Honestly, I'm starting to look at it more than Facebook! The above image is from my "front page", all the ever changing goodies I see when I log in.
What is Pinterest? They describe it like this in the about section of Pinterest "Think of Pinterest as a virtual pinboard — a place where you can create collections of things you love and "follow" collections created by people with great taste." But for me its a cross between a visual twitter and a really pretty google image search meets google reader. The layout is great and the functionality is so easy. What I like best is that I don't have to open any new programs, or do anything special exactly, other than installing the little browser add-on which makes pinning something super simple. Without investing any time in learning to use it, I can just create inspiration boards, group products together, and keep track of the things I like and inspire me!
 This image from Kim's "Ideas" board, one of my favorite boards.
Why am I telling all of you about it? Well, one of my favorite things to follow on Pinterest is the ever growing DIY segment. So many people have boards titled DIY and there are some really great ideas, how-tos, and of course more inspiration!
 This from Jesyka's "I heart handmade quilts" board, also great.
And, the more people on Pinterest the wider the variety & quality of the stuff pinned thus making searching on Pinterest better and better. I just can't get enough of it! (While looking for images to use in this post, I again got sucked down the rabbit hole!)
Tuesday, March 22, 2011
Like Clockwork
Jen here. Recycling and upcycling are two of my favorite ways to get material for my projects. At the last bead show I attended I bought a bag of watch parts and proceeded to play with them the second I got back to a work space. I had a few used gift cards around and figured I'd throw those into the mix, too.
Here is the random mix of parts before I started playing.
 I started cutting shapes out of the gift cards and drilled holes in them. Hmmm, wonder where I got them... hee hee.

Here are some earrings I made with just findings and watch parts.

And the ones I paired with the gift card shapes and watch parts.

Watch parts and beads...
 The most fun for me is spreading out all the random materials I collect and just start mixing and matching. Put stuff next to each other to see how materials interact visually. Basically, just play and see what happens. Playing without expectations is the surest way to break any creative block.
Here is the random mix of parts before I started playing.
 I started cutting shapes out of the gift cards and drilled holes in them. Hmmm, wonder where I got them... hee hee.
Here are some earrings I made with just findings and watch parts.

And the ones I paired with the gift card shapes and watch parts.

Watch parts and beads...
 The most fun for me is spreading out all the random materials I collect and just start mixing and matching. Put stuff next to each other to see how materials interact visually. Basically, just play and see what happens. Playing without expectations is the surest way to break any creative block.
Monday, March 21, 2011
Hearts Afire
Jen here. Thought I'd share my latest project. I was sitting at my table during the Staple! show listening to my neighbor talk about how his friend modified one of those blank Munny's by cutting out it's chest and dangling a heart from the inside. Somehow that translated into this necklace idea.
 I started with a sketch. The idea for the ring around the heart was modeled after a hose clamp, like the ones you find under the hood of your car. I wanted to add texture so I thought it would be nice to make the heart out of felt.
 I had intended to use brass for the ring but couldn't find it due to my recent move so I finally cut into the silver sheets I've had laying around for years. It felt good being brave enough to use it.
 So I cut into the silver, drilled holes at each end, shaped it around one of my mandrels and bent the ends. I took some wire, looped it and hung some chain from the center.
 I cut out the felt heart...
 ... sewed the edges and stuffed it with cotton.
 Add some chain and there is my necklace idea pretty much how I was imagining it. Which is a rare thing, but a pleasant surprise.
Thursday, March 17, 2011
Creative Music Videos
In honor of SXSW, we thought we would share with you some artistic music videos that may inspire your next project!
Wax Tailor featuring Charlie Winston I own you
What you'll find in this video: SMA paper cut outs that create an entire city, a fold out house, lots of typography.
Architecture in Helsinki Like it or Not
What you'll find in this video: ZOMG the whole thing is embroidered!
They Might Be Giants Why does the sun shine?
What you'll find in this video: SMA felt cats explain why the sun is so darn hot. Mmmm, crafts AND science!
Lisa Hannigan I don't know
What you'll find in this video: An empty room becomes filled with paper cut outs.
White Stripes Fell in Love with a Girl
What you'll find in this video: SMA Lego goodness. Michael Gondry goodness. And perhaps a weird memory of high school...
Ok Go This too Shall Pass
What you'll find in this video: An elaborate Rube Goldberg Machine. Legos make a cameo.
Smashing Pumpkins Tonight Tonight
What you'll find in this video: A creepy paper mache moon. More weird high school memories.
We can't have a post about music videos on Get Crafty with out Leslie and the Lys!
Leslie and the Lys Craft Talk
What you'll find in this video: A giant gem sweater. :D
*Warning!* Shameless Plug Ahead! If you have a love for Rock n Roll, my brother's band Night Horse is in from Los Angeles to play SXSW this year. Check them out if you dare!
PacoVolume Cookie Machine
What you'll find in this video: Stop Motion Animation (hereto refered to as "SMA") paper, typography, rotoscoping, perler beads, embroidery thread, nails, clay... I'm definitely leaving something out.
Wax Tailor featuring Charlie Winston I own you
What you'll find in this video: SMA paper cut outs that create an entire city, a fold out house, lots of typography.
Architecture in Helsinki Like it or Not
What you'll find in this video: ZOMG the whole thing is embroidered!
They Might Be Giants Why does the sun shine?
What you'll find in this video: SMA felt cats explain why the sun is so darn hot. Mmmm, crafts AND science!
Lisa Hannigan I don't know
What you'll find in this video: An empty room becomes filled with paper cut outs.
White Stripes Fell in Love with a Girl
What you'll find in this video: SMA Lego goodness. Michael Gondry goodness. And perhaps a weird memory of high school...
Ok Go This too Shall Pass
What you'll find in this video: An elaborate Rube Goldberg Machine. Legos make a cameo.
Smashing Pumpkins Tonight Tonight
What you'll find in this video: A creepy paper mache moon. More weird high school memories.
We can't have a post about music videos on Get Crafty with out Leslie and the Lys!
Leslie and the Lys Craft Talk
What you'll find in this video: A giant gem sweater. :D
*Warning!* Shameless Plug Ahead! If you have a love for Rock n Roll, my brother's band Night Horse is in from Los Angeles to play SXSW this year. Check them out if you dare!
Thursday, March 10, 2011
It's Curtains...For My Bed
 I've moved into a loft which is basically one open space, so I thought it would be nice to divide the space up a little. I wanted to create a separate space for my sleeping area as the rest of the space is a working/crafting area. I decided to make and install curtain and it gave me the chance to get a little creative...
 Since there were no walls on which to install a run of the mill curtain rod, I had to find an alternative that would allow me to hang the rod by attaching it to one wall and suspending the other end some how. So here's what I came up with. The rod is actually a 10 foot galvanized plumbing pipe!
On the suspension side, I used a chain with a ring at the end of it suspended from the rafters. That little blue bit is painter's tape. Here's the part where I admit that I didn't do this perfectly. Since I didn't have a high enough ladder. I taped a hook to the end of my broom handle then hooked it to the rafter. I then tugged hard (maybe too hard) to pull the tape off...and not all of it came off. So I'm gonna need to borrow a ladder and do it right...lol.

The pipe also happens to be threaded on both ends so I used a plumbing floor flange, but installed it on the wall and simply screwed in the end.

I made the curtains from liner because it was cheap and I didn't need any real thickness because these were just to divide space and I didn't want to lose much light anyway. I made very simple curtains by folding the top edge over twice and then I sewed about half an inch in from the top and a half an inch from the bottom of the folded edge...

and here's the part where the real sewers might want to close their eyes/shut their ears, I cut a slit every five and seven inches alternating and fed the pipe through (as you can see below). This is what gave the curtains a gathered look without having to do a proper gather. So if you look closely you can see the unfinished/frayed edges, but sigh, I am admittedly a quick and dirty crafter. Would be curious to hear ideas of how people might get around the fray. I thought about iron on ribbon...Any ideas?

I use ribbons to tie the curtains when I don't want them blocking the space. I will eventually install a hook on the side of the wall so I can sweep them to one side, if necessary.

I liked the look so well, that I decided to install it at the head of the bed as well. Ok, ok, it's also because I have commitment issues with putting artwork on walls and this was an easy way out. ;)

Thursday, March 3, 2011
Get Crafty during SXSW!
Every year our town goes on overload during South by Southwest (SXSW) and there is something new and different to do every night of the week. I'm going to let ya'll know about some artsy & crafty events that are totally open to the public and should not be missed!
Kicking things off on Friday, March 11th, Up Collective is having their first ever gallery opening from 7-10pm at Starving Art Studios. The new collective consists of the artists we share quarters with at Starving Art, and they're planning some great programming all year, so stay tuned!

Artist in residence, Emily Mitchell is heading up the group and does amazing drawings of faces, as evidenced in her self portrait, above. On Saturday, March 12th, you'll have a couple options. First off, the folks from Etsy.com, headquartered in Brooklyn, are heading down and hosting two days of parties on Saturday and Sunday, 12pm-2am at 222 on 6th Street (Aces Lounge). The programming will include on site make and take crafts, DIY installations, an awesome showcase of local crafters put up by EtsyAustin (full disclosure, I'm the president of EtsyAustin), a fashion show from Burda Style, panel discussions from big names in the crafting industry, and of course face time with the peeps who make Etsy amazing! Visit the event page on Facebook for more details and to RSVP.
Also on Saturday the 12th, Friday the 18th and Sat. the 19th, Equinox Mish Mash goes down at Starving Art's backlot (Blue Starlite), featuring art, film and music. See their Facebook event pages for more details. Stella's will be open for business during these parties, so come on by and say hello!
Don't forget to visit South Congress both weekends to shop tons of local artists!
For those of you into music, I have to plug my hubs. His podcast, Active Listener, is set to release a series of SXSW favorites. He's listened to about half of the 2000 bands set to come, and will let you know his favorites and what not to miss in the music arena. Last year he had 13 mixes of different genres!
Hope your SXSW experience this year is awesome! Let us know what you're up to!
Kicking things off on Friday, March 11th, Up Collective is having their first ever gallery opening from 7-10pm at Starving Art Studios. The new collective consists of the artists we share quarters with at Starving Art, and they're planning some great programming all year, so stay tuned!

Artist in residence, Emily Mitchell is heading up the group and does amazing drawings of faces, as evidenced in her self portrait, above.
 On Saturday, March 12th, you'll have a couple options. First off, the folks from Etsy.com, headquartered in Brooklyn, are heading down and hosting two days of parties on Saturday and Sunday, 12pm-2am at 222 on 6th Street (Aces Lounge). The programming will include on site make and take crafts, DIY installations, an awesome showcase of local crafters put up by EtsyAustin (full disclosure, I'm the president of EtsyAustin), a fashion show from Burda Style, panel discussions from big names in the crafting industry, and of course face time with the peeps who make Etsy amazing! Visit the event page on Facebook for more details and to RSVP.
Also on Saturday the 12th, Friday the 18th and Sat. the 19th, Equinox Mish Mash goes down at Starving Art's backlot (Blue Starlite), featuring art, film and music. See their Facebook event pages for more details. Stella's will be open for business during these parties, so come on by and say hello!
Don't forget to visit South Congress both weekends to shop tons of local artists!
For those of you into music, I have to plug my hubs. His podcast, Active Listener, is set to release a series of SXSW favorites. He's listened to about half of the 2000 bands set to come, and will let you know his favorites and what not to miss in the music arena. Last year he had 13 mixes of different genres!
Hope your SXSW experience this year is awesome! Let us know what you're up to!
Wednesday, February 23, 2011
My Handmade Nursery
 Today I was at last able to get some decent pictures of the nursery. Baby Orion was born way back on January 8th and almost everything in the nursery was ready for him. I know I've mentioned a few projects in previous posts so here they are, finally!
A few weeks ago in the post about the Martha Stewart Fabric Crafts book I mentioned that I used her tutorial to make a bumper for my crib. I didn't follow it exactly, and thus my bumper is more floppy than I'd like, and I definitely ran into a few crafty disasters, but I'm really happy with it. Kim and my mom helped me finish it in time, only a week before Orion's due date.

We did a patchwork of a bunch of lovely Echino fabrics I bought both here at the Stitch Lab and back in LA at Michael Levine. Getting the order of the patchwork just right was pretty complicated, especially since I've never done quilting!
 I'm proud of the finished product and Orion loves to stare at it, especially the black buses. You can also see the signed crib sheet from my shower that I love to read for Orion.
 Also from my Texas baby shower, the monster mobile! Now making that mobile was a lot more time consuming than I'd figured, below is the way I did the layout. I actually made two mobiles since I had so many monsters,the second one is for over the changing table, and he loves it!
 Some of you know the story of my crib, so I'll just tell a condensed version here. Long story short I couldn't find the crib that I'd fallen in love with available anywhere, so I ended up buying it on Craigslist from someone in Orange County, CA! Had it shipped out here and then I painted the ends gray to match the nursery better (they were originally a blue shade that I detested). I had specifically fallen in love with the slats with their little circles, and still, I'm in love with it!
 We also did a DIY changing table inside our old armoire. Aaron built a little slide out shelf for the pad to go on and it works like a charm. We ended up taking the doors off it though, cause it was annoying to always have to open them up when O needed a changing. Also above on the back of our glider, you can see this quilt a friend of mine's mom made, its pretty amazing!
 Here is the opposite view of the room with our little fold out futon for guests, I have been meaning to get it reupholstered so for the pic I just tucked the fabric's on, you get the idea. The little owl guy there is a crocheted gift from a friend in LA who owns Peanut Butter Dynamite, she also made the crochet throw hanging on the side of the crib. And note my Vampire Weekend print I got last year at the SXSW flat stock show.
Next, I'll talk about the lighting. We got this sweet anemone light (I'd seen on the Project Nursery blog) from my awesome Mother-in-law, but when it arrived it was soooo heavy. Probably weighed like 50lbs and the screws were all but impossible to get in, so we had to rig up this system to perch it up against the ceiling and screw it in (mind you I was like super prego during this project and basically no help). You might be able to see in the pic, but we used a bunch of craft books to get the right height, haha!
 The other lights are an LED strand of lights from Ikea that I added the little balls on. I got the colored balls from Thailand when we were on our trip and hadn't figured out a use til now. I had to hot glue them onto the strand and they ended up working perfectly.
 Down in the corner there you can see the octopus chair I designed for Babystyle when I worked there in 2006, a family friend had it as a hand-me-down and was so generous to give it to us!
And lastly, I sewed up these little owls from a kit I bought at the Tate Modern in London when I was there last year, they're puppets!

Subscribe to:
Posts (Atom)
