Friday, April 29, 2011

Jesyka's Pinwheel Tutorial


Making the Pinwheel


Don't forget your materials!

1) Take your square of paper, and create guides from each edge toward the center, about 2/3s of the way down. Mark the center. You can do this with either a ruler, or by folding the paper in half from corner to corner, and cutting along the folds.

2) Cut your paper from the edge to the guide. If you are using a paper cutter, it's easy to align the edges across a diagonal to ensure that your cuts all point toward the exact center.

3) Punch a hole at the bottom right corner (or bottom left -- just make sure its the same corner!) of each triangular flap.

4) If your hole punch doesn't have enough give to punch the center hole, use the edge of the skewer to punch the hole. :) If you manage to punch a hole with your hole punch, place the center hold on the edge of a skewer. This helps to keep the holes lined up while we fold in the edges.

5) Put a dab of hot glue near the center. Try not to cover the skewer too much (a little is okay), or you'll have a difficult time getting the skewer back out.

6) Place the holes on the edge over the skewer. It's best to go in a rotational order. Glue in between each layer if needed. Now we have a basic pinwheel! I prefer to have a more finished piece, so I like to make a centerpiece to go over the little flaps in the center.
Making the Centerpiece

7) Get out your small square of paper and corner punch.

8) Punch those corners!

9) Using your hole puncher, punch a hole in the middle.

10) Add a bit more glue to the center.

11) Place the small paper over the skewer. I like to place it so a corner of the the small paper is in the center of each flap.

12) Place an eyelet in the center. Use the eyelet setter to really help it stick together, and keep it sturdy. The pinwheel is done and we are ready for the next stage!
Making the Pinwheel Stick

13) Place a small dab of hot glue at the blunt end of the bamboo skewer.

14) Cut your ribbon at a 45° angle and place the edge flush against the top of the blunt end of the skewer to get the ribbon to twist nicely and evenly around your skewer. To ensure you have enough ribbon, do not cut the ribbon from the spool until we are done wrapping.

15) Continue wrapping the ribbon around the skewer.

16) Place a small bit of glue at the tip of the skewer.

17) Cut the ribbon after you wrap it around the glue. Now get out your wooden beads!

18) Place the bead on the end of the skewer. Add some glue to make it stay! (not shown).


Assembling the Pinwheel

19) Slide a couple of beads on to the pinhead.

20) Next, slide the pinwheel on, front facing the pinhead.

21) Pull the pin through the back.

22) Add a few more beads to the pin.

23) Stick your pin through the ribbon-wrapped skewer about an inch and a half down from the blunt edge. If you're having trouble, use an ice pic or a nail and hammer to start the hole. :) At this point you'll want to make sure it spins, so blow on your pinwheel. If it gets stuck, you'll want to add more beads between the pinwheel an the skewer (you can see how I added a fourth bead to ensure that it spins nicely).

24) Using your wire cutters, trim the excess pin.

25) There will be a little knub left, which could cut someone, so;

26) Put a dab of hot glue over the knub to protect fingers. You could cover with another bead or another piece of ribbon if you want to distract from it.

27) Glue a bead on the top, if you have not already done so.

28) And we are done! Admire your completed work. :)


Thursday, April 28, 2011

Jesyka's Pinwheel Tutorial: Materials List


I made these sweet pinwheels for favors and decor for my daughter's birthday party, and although I know there are plenty of pinwheel tutorials out there in blogland, I thought I would make my contribution seeing as these are a bit more elaborate than I have seen elsewhere. Since the materials list is long, (and I need a bit more time to prepare the step-by-step guide--Laelia is napping less and needing mommy more!), I'm releasing the materials list first, and hopefully I'll have the tutorial ready to go tomorrow! Stay tuned!


1) Paper! A lightweight cardstock works best, too thin and it doesn't have enough substance, and too thick it's too hard to fold, although any paper will definitely work. We even used some spray mount and glued some wrapping papers together to make some pretty double sided sheets (wrapping paper is great for many things, it's so cheap compared to the expensive sheets used for scrapbooking!). We did 6" x 6" for the large wheels, and 4.5" x 4.5" for the smaller wheels.


2) Scissors - For cutting slits in the paper. Alternately, you can use a paper cutter. I used both, depending on what was closest, they both have their advantages and disadvantages. A paper cutter will assure you a straight measured line, but there is something satisfying about picking up and just eyeballing a 45° angle...


3) Wire Cutters - The sort you'd use for jewelry making will work just fine. These are to cut the backs off the pins once we have them through the skewers.


4) Ribbon - To wrap around the skewers. Make. Pretty.


5) Eyelet Setter - To help set the eyelet in the center of the pinwheel. I have this set from JoAnns.


6) Beads - I used some glass beads I have had for about 15 years! Any beads larger than a seed bead has potential to work here.


7) Eyelets - These came as a set with the eyelet setter I bought. Use these at the center of the pinwheel.


8) Pins - A pin with a decorative head will work best, or you can glue a button or a cabochon will work as well. Just make sure that the pin head is large enough to hold on a bead. I bought these pins to hold the ribbon on the bouquets for my wedding. :)


9) Large Wooden Painted Beads - These go on the ends of the skewer to finish it off nicely. I bought a big pack of wood beads like these from JoAnns.


10) Hole Punch - You'll use this to punch holes, of course! Use a small hole punch.


11) More Paper! - These are 1.5" x 1.5" pieces of paper that get prettied up and are used in the center of the pinwheel.


12) Fancy Edge Cutter - To pretty up that piece of paper I was just typing about. :)


13) Bamboo Skewers - Use as the base of the pinwheel.


14) Glue Gun - We can always use a glue gun!

Friday, April 15, 2011

Shop +Craft = Shop Crafty!

Our first big spring show is finally HERE! Shop Crafty is this Saturday, April 16th 10am-5pm and I've been geting really amped up about all the cool stuff that will be going on at the show.

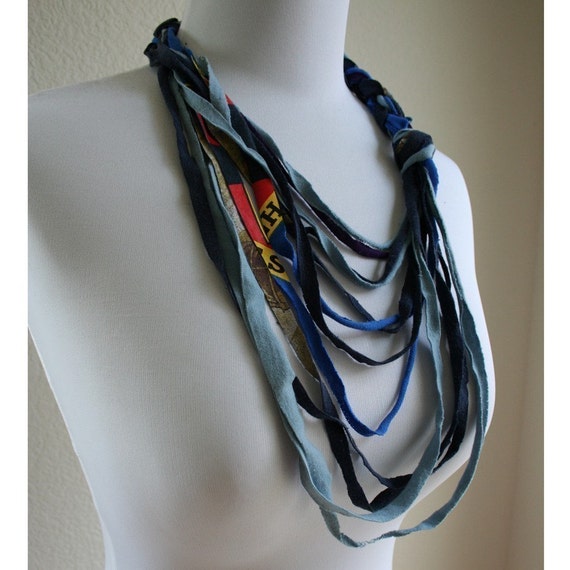
First off, you'd better be early because the first 30 will receive awesome goodie bags full of great stuff from us and the other sponsors! We've donated one of crafty tutorials for the ever popular Upcycled Strand Necklace. Read here for more about the other sponsors.And Since we're crafty studio sponsors, we'll have a huge booth with craft lounge! The craft we're doing is to collage & decoupage onto match boxes.

Great if you need matches on display anywhere (um...probably a good idea in the bathroom...) and fun if you just need a little box for buttons or other treasures (ie. if you are a kid who shouldn't have matches or a kid at heart who loves treasure boxes).
It will be a FREE craft, so come play with us! And if you want, bring your own items to decoupage, we'll have lots of great papers & supplies available.

Friday, April 1, 2011

Get Inspired: Pinterest

I'd like to make the forecast that Pinterest is going to be the next big thing. I might be wrong, but I'm certainly enjoying 'wasting' a lot of time getting sucked down its rabbit hole. Honestly, I'm starting to look at it more than Facebook! The above image is from my "front page", all the ever changing goodies I see when I log in.

What is Pinterest? They describe it like this in the about section of Pinterest "Think of Pinterest as a virtual pinboard — a place where you can create collections of things you love and "follow" collections created by people with great taste." But for me its a cross between a visual twitter and a really pretty google image search meets google reader. The layout is great and the functionality is so easy. What I like best is that I don't have to open any new programs, or do anything special exactly, other than installing the little browser add-on which makes pinning something super simple. Without investing any time in learning to use it, I can just create inspiration boards, group products together, and keep track of the things I like and inspire me!
This image from Kim's "Ideas" board, one of my favorite boards.

Why am I telling all of you about it? Well, one of my favorite things to follow on Pinterest is the ever growing DIY segment. So many people have boards titled DIY and there are some really great ideas, how-tos, and of course more inspiration!
This from Jesyka's "I heart handmade quilts" board, also great.

And, the more people on Pinterest the wider the variety & quality of the stuff pinned thus making searching on Pinterest better and better. I just can't get enough of it! (While looking for images to use in this post, I again got sucked down the rabbit hole!)