Friday, January 28, 2011
I heart Martha: Book Reviews
Last year for Christmas I received Martha Stewart's Encyclopedia of Crafts from my mom. I've always loved Martha and looked up to her as an incredibly successful creative woman, but most of all I just love the "look" she creates. The WonderCraft gals and I have been inspired by several of her projects in the Encyclopedia of Crafts from glass etching to rubber stamp carving. Its by no means an exhaustive text of all crafts under the sun and I was disappointed to not find certain crafts, such as needle felting. As the hallmark of Martha, it is a beautiful book with relatively easy to follow instructions and inspiring projects with gorgeous pictures.
This year I put Martha Stewart's Encyclopedia of Sewing and Fabric Crafts on my wish list and luckily my Mother-in-law got it for me. Its as beautiful and inspiring as her earlier book and a bit more in-depth in terms of sewing instruction and hand sewing techniques. Its also filled with great projects and I've already done one. I used her instructions and pattern to make a semi-quilted crib bumper (pics of that to come!). As in her previous book, the instructions are meant for people with some crafting experience and the projects may require some trial and error, but again Martha provides some awesome inspiration.
This hefty tome is another Martha item from my wishlist. Martha Stewart's Homekeeping Handbook is filled with detailed instructions and handy tips for "caring for everything in your home". Now to be honest I've only read the laundry section, but its amazing, she even includes a spreadsheet on how best to remove specific stains on specific fabrics and recommends printing out a copy of it to post in the laundry room. I'm excited to consult it further on the myriad of things to care for around the house. Unfortunately its 752 pages are inspiring only in their explanations & detail, all the pictures are in black and white.
Do you love Martha? Have you completed any projects from her books, magazines, or shows? Please share!
Thursday, January 20, 2011
A Shrine to Jewelry. Why Not?
You may have read in a previous post that the girls and I are doing a project in conjunction with the Amon Carter Museum in Fort Worth, TX. We were to select three pieces from the collection and create a craft inspired by those pieces. I selected Joseph Cornell's Soap Bubble Set.
Joseph Cornell (1903-1972)
The division of space and use of three dimensional objects in the piece inspired me to create a Shadow Box Jewelry Shrine. From a "crafty" perspective (is there such a thing?) I always disliked the idea that jewelry gets hidden away in a box or drawer when not worn and loved the idea that it could be displayed as a part of a work of art and functionally stored at the same time. So I thought I'd share the "how to" with all you crafty folks out there.
I then cut a piece of self healing cork to the full size of the back. Cutting to the full size of the frame rather than the size of the glass was important because I wanted the background to sit away from the front of the frame to create a shadow box effect. I had to reinforce the cork with a stiff cardboard, so I cut up a box I had lying around. (Yes, that's a rip in the cork...no I am not Martha Stewart...I hid my boo boo by gluing it to the background. lol)
I glued the cork to the backing.
I then selected an image from a vintage Life magazine. This one happened to be an ad for hair dye...something about washing the grey away.
I then laid the frame upside down over the image, marked the proper placement for the ribbon, and attached the ribbon with both glue and staples.
Finally, I attached the backing to the frame. Broaches can be stuck directly in, the ribbon can be used as an earring hanger, and T-pins can be used to display any other jewelry in any desired configuration. Et Voila!
Soap Bubble Set (Lunar Space Object), ca. 1959 Mixed media
The division of space and use of three dimensional objects in the piece inspired me to create a Shadow Box Jewelry Shrine. From a "crafty" perspective (is there such a thing?) I always disliked the idea that jewelry gets hidden away in a box or drawer when not worn and loved the idea that it could be displayed as a part of a work of art and functionally stored at the same time. So I thought I'd share the "how to" with all you crafty folks out there.
I then cut a piece of self healing cork to the full size of the back. Cutting to the full size of the frame rather than the size of the glass was important because I wanted the background to sit away from the front of the frame to create a shadow box effect. I had to reinforce the cork with a stiff cardboard, so I cut up a box I had lying around. (Yes, that's a rip in the cork...no I am not Martha Stewart...I hid my boo boo by gluing it to the background. lol)
I glued the cork to the backing.
I then selected an image from a vintage Life magazine. This one happened to be an ad for hair dye...something about washing the grey away.
I then laid the frame upside down over the image, marked the proper placement for the ribbon, and attached the ribbon with both glue and staples.
Finally, I attached the backing to the frame. Broaches can be stuck directly in, the ribbon can be used as an earring hanger, and T-pins can be used to display any other jewelry in any desired configuration. Et Voila!
Labels:
Amon Carter Museum,
cork,
display,
frame,
jewelry,
Joseph Carter,
shrine,
vintage
Thursday, January 6, 2011
Fabric Flowers Inspired by Roesen Painting
Severin Roesen (1815 or 1816—after 1872) Still Life of Flowers and Fruit with a River Landscape in the Distance, 1867 oil on canvas; Amon Carter Museum, Fort Worth, Texas |
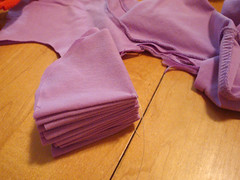
At the Carter Museum, we'll be demonstrating how to make pretty flowers from upcycled t-shirts, as inspired by the abundance of flowers in this gorgeous painting from the collection. We'll have 3 different types to show the museum guests who want to get crafty with us.
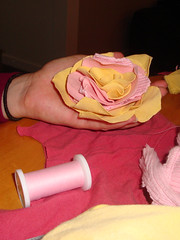
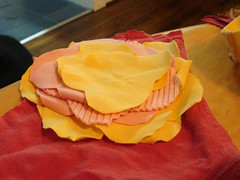
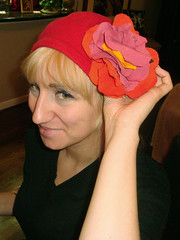
One type is made from stacking layers of clover-shaped fabric, resulting in a sweet flower with big, floppy petals. Marley models one she made, showing how cute it would be as an embellishment on her beret.
Another, slightly more involved, type is a really full flower made from circles of fabric that are first folded into wedges & strung together, then fluffed & sewn in place & fluffed some more until you get it just right.
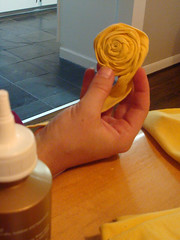
The last type of flower we made was a super-simple rolled one. It works great with the hem of a shirt, especially if it has some fancy trim or stitching.
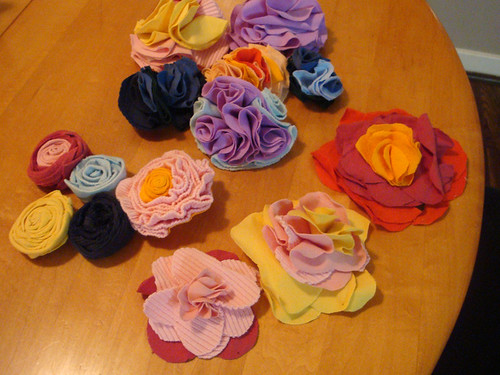
Here's all of our finished little pretties ready to be placed in an arrangement. I'll be attaching them to stems of some sort & arranging in a vase for their big debut in Ft. Worth.
We have two more art-inspired project examples we'll be taking with us to Ft. Worth as well. Stay tuned to see those in future posts!
Labels:
Amon Carter Museum,
art,
craft,
crafty,
fine art,
floral,
flower,
handmade,
inspiration,
make,
museum,
recycle,
upcycle,
wonder craft,
wondercraft
Subscribe to:
Posts (Atom)